surveillance camera from RF Concepts, capable of working under illumination levels as low as 0.003 Lux.
This camera is ideal for satellite tracking and astronomical imaging.

Being a board camera it first required to be built into a box fitted with a lens mount.
Initial tests found that some of the components on the PCB run quite hot, particularly at its rated
12V supply voltage. A small CPU fan was therefore also included in this box. It was also found that
reducing the supply voltage to 9V causes these componenets to run colder with no reduction in the
camera's performance. A regulated 9V supply was thus also included in the camera box.
I used the standard camera like this for a while, enjoying every minute of it and was very impressed
by its low light capability. Fitted with a standard 135mm f/2.8 (film) camera lens, I managed to see
stars fainter than magnitude 9, running at PAL video rate (25 frames/sec)!
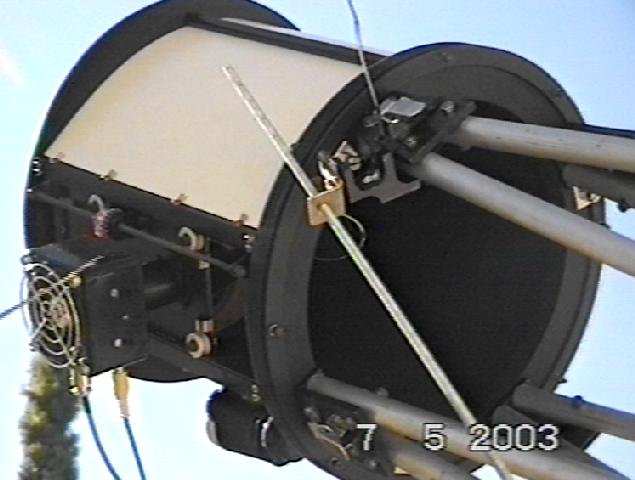
The lens mount was also fitted with a drawtube to be mounted at Newtonian focus on my 9-inch telescope,
seen here while capturing the 7 May 2003 Transit of Mercury. Stunning views of the Moon are produced by this setup.
However, when viewing objects not filling the field, like planets, the camera's automatic exposure control completely
over-exposes the object, trying to cope with the large area of dark background. Manual exposure control is thus required.
A web search revealed two good sources of Manual Gain Control modifications done to a 1004x,
where Steve Chambers and Jon Grove both experimented with this before.
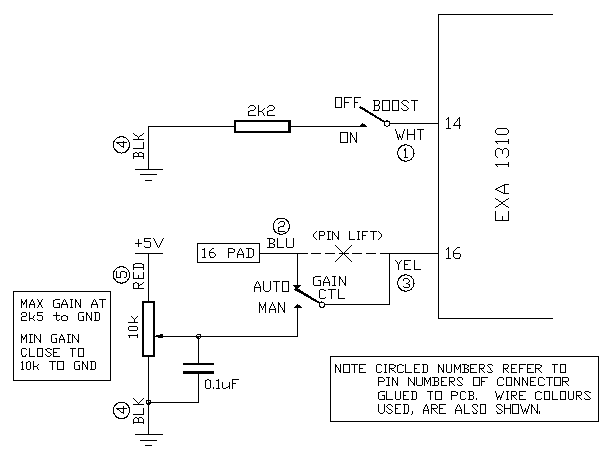
After studying these websites, I decided to try Steve's pin-16 mod (requiring a pin-lift) for
manual gain control and Jon's Increasing gain pin-14 mod, called Boost for the rest of this page.
The latter can potentially increase the limiting magnitude capability of the camera. To enable testing,
I added switches to both to disable them, effectively returning the camera to its original, unmodified state.
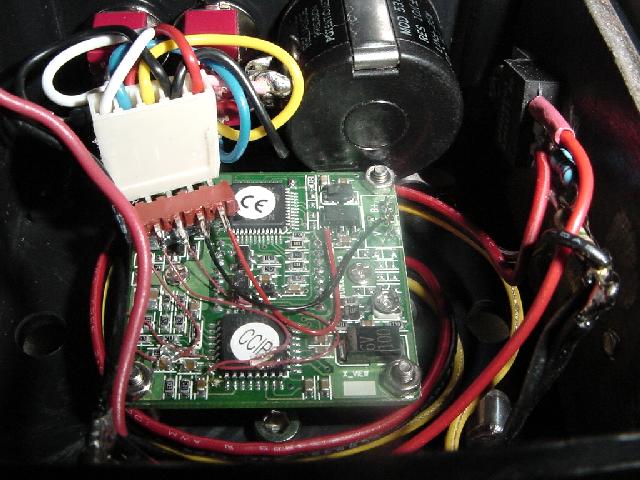
A view inside my camera box, implimenting the circuit above.
Initial Testing
To ensure repeatable test results, I did some tests indoors at night, under controlled lighting conditions.
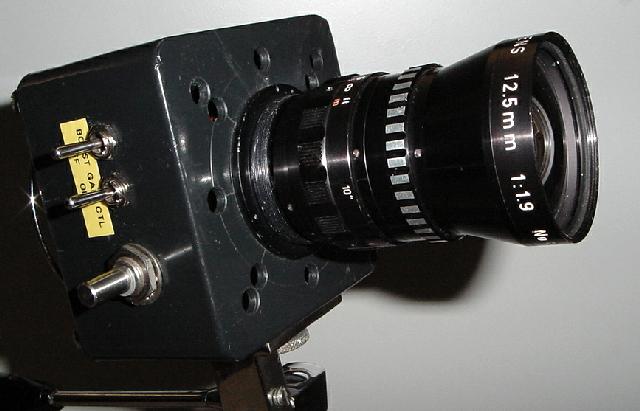
The camera was fitted with a 12.5mm f/1.9 lens, mounted on a tripod and images captured using Snappy.
(You might be wondering why the images all have a black triangle on the left hand edge - this is due to
some strange artifact when Snappy'ing images from the 1004x at any mode higher than Moving Scene.)
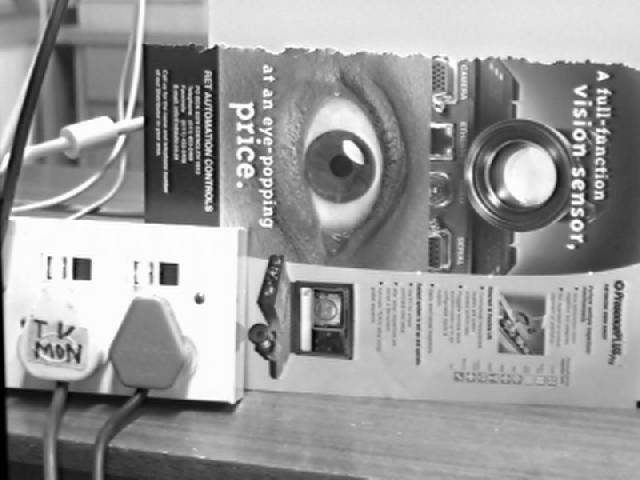
As reference, this shows the scene under full room lighting conditions.
For the next three images, very dim lighting was used to test the effect of the gain mods.
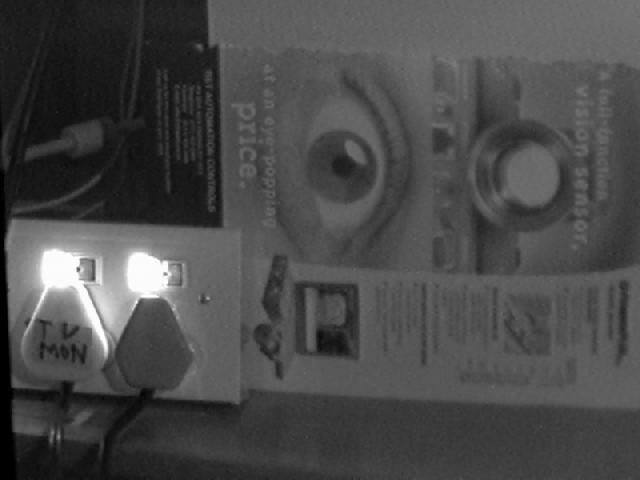
Under reduced lighting, this image was captured with the switches set to put the camera in its original, unmodified mode.
The bright neon lights on the plugboard came out over-exposed with the rest of the scene washed out under the dim light.
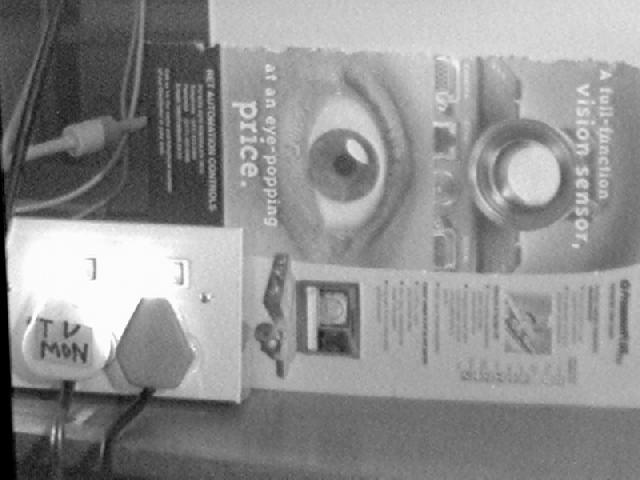
Firstly, the effect of Boost was tested by switching Boost ON.
The picture brightens up considerably but also increases the noise.
(Note the increased over-exposure of the neons.)

Next, Gain Control was switched to Manual and the pot set to maximum. (Boost was switched off again.)
As can be seen, there is no real difference to the camera in its original mode, meaning that the camera
was already at maximum gain and that maximum Manual Gain does not increase the gain above this level.

The pot was now set to minimum gain.
The bright neons in this test represents the conditions when observing a bright object (eg Jupiter) normally
being over-exposed against the dark sky. By reducing the gain, over-exposure is reduced and detail now
becomes visible in the neons.
Artificial Star Testing
The effect on limiting magnitude is best tested on the stars themselves but was not possible at the time since it was raining.
I therefore produced an artificial starfield by punching tiny holes in a piece of cardboard and placed it in front of a dimly illuminated surface.
(Note, the following pictures can be viewed at 800x600 by right-clicking.)
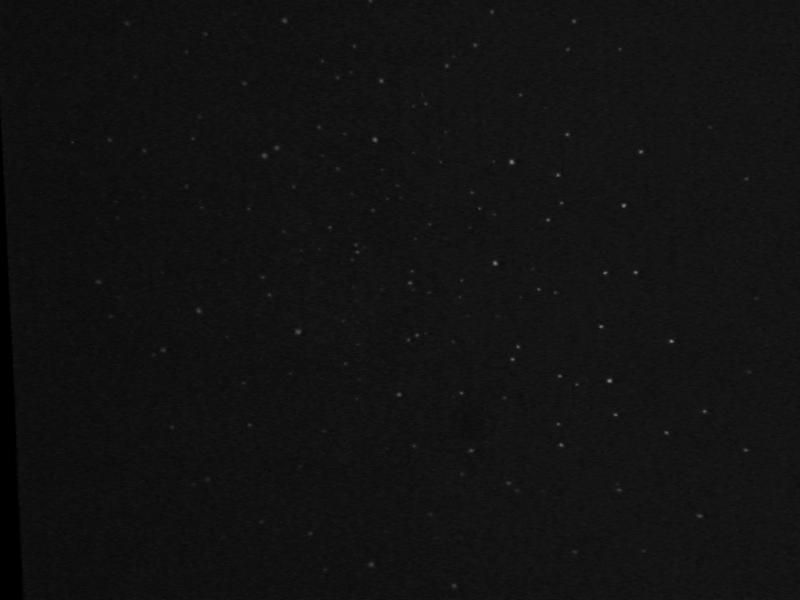
The "starfield" with the camera switched to its original, unmodified mode.
The same scene, taken under identical conditions with Boost mode switched ON.
Real Star Tests
The weather cleared the next night, allowing me to test weather the improvement is true in real life as well.
Tests were done with both a 135mm f/2.8 lens (giving a 2.1° x 1.6° field) and the 12.5mm f/1.9 lens (giving a 22° x 17° field).
The wide angle but lower liming magnitude capability of the 12.5mm lens makes is better suited for contellation views.
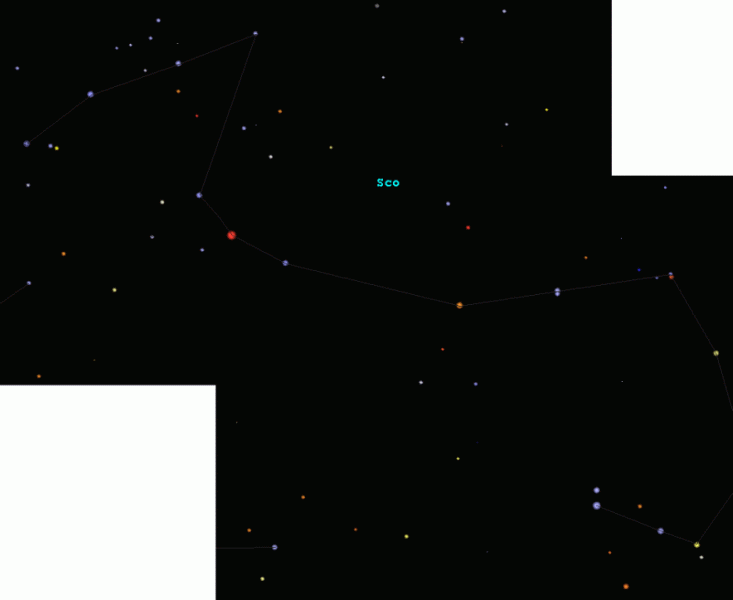
Since it was winter, Scorpius was an obvious choice. Here is a reference field to magnitude 5.8, slightly higher than the capability of the lens.
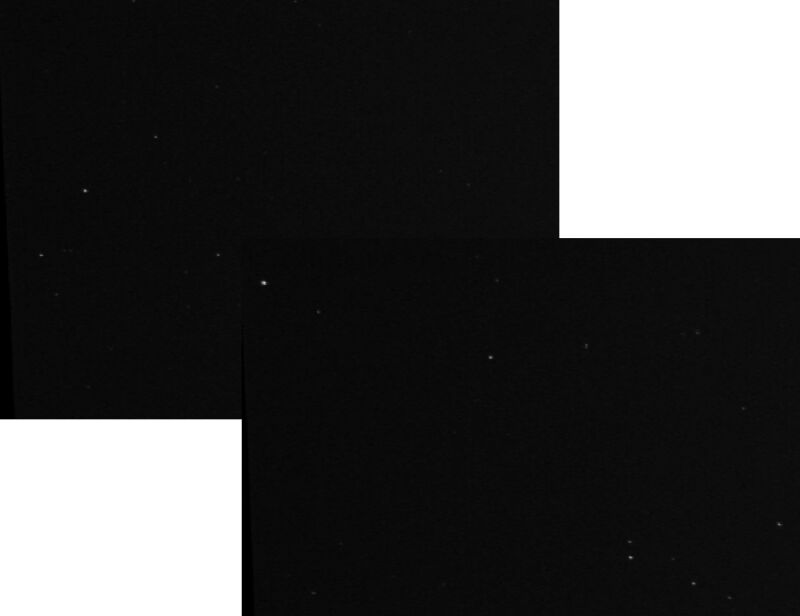
A composite of two images with the camera switched to its original state.
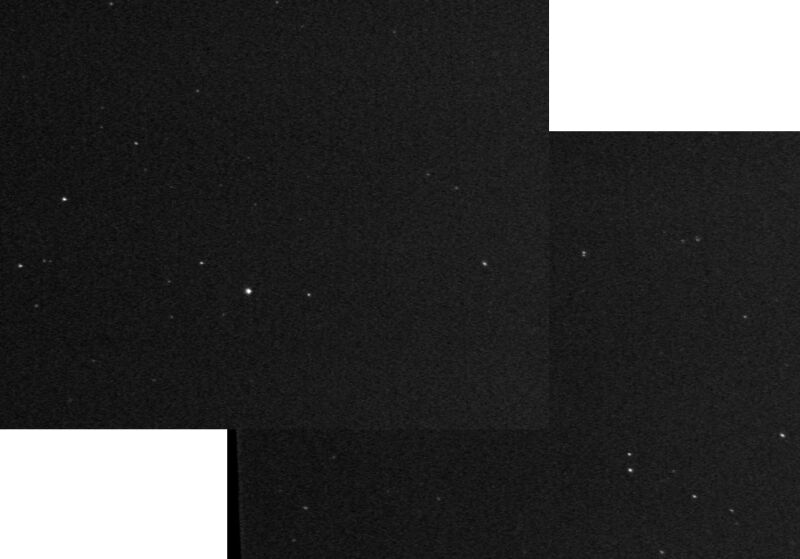
The same shot, with Boost switched ON. A clear improvement in limiting magnitude.
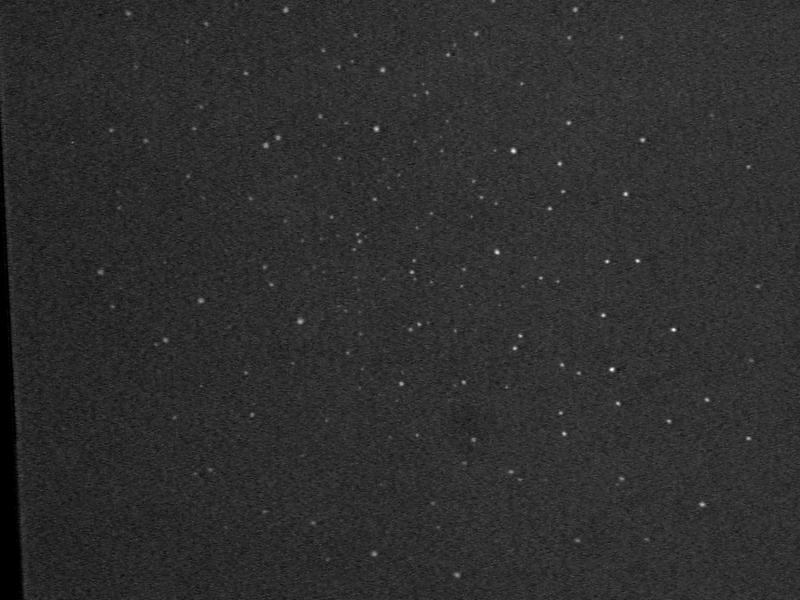
M7 was used to test with the 135mm lens, capable of about magnitude 9.
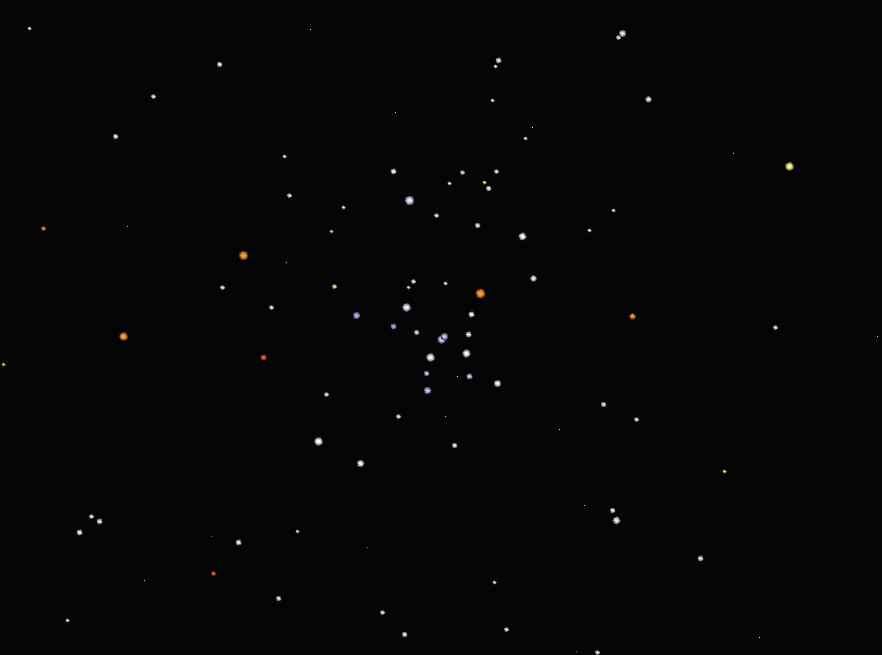
Reference image, again slightly deeper, going down to magnitude 9.5.

Open cluster, Messier 7 imaged with the camera in its unmodified state.
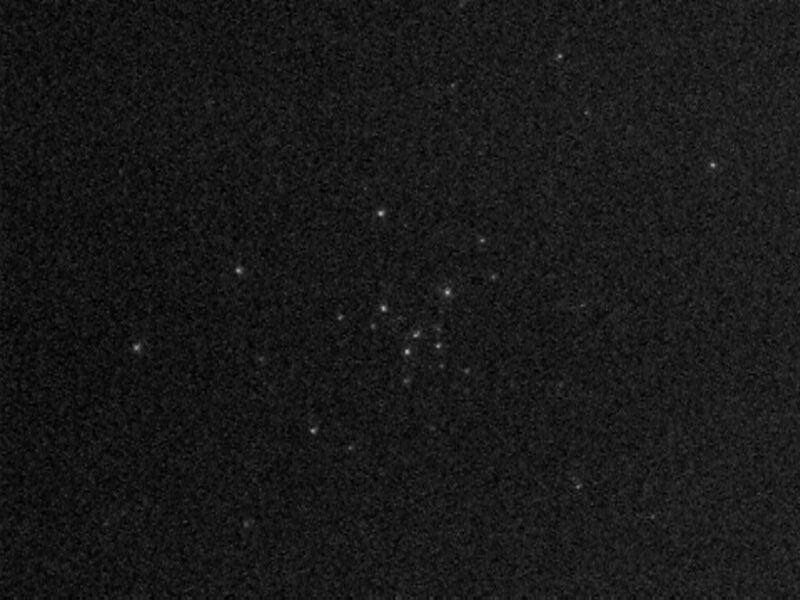
M7 boosted. Again, the improvement is quite clear despite the increase in noise.
(Note, these are all raw images with no image processing done to them at all.)
